
The Ultimate Beginner’s Guide to Backpacking with Babies: The Basics
- Blog The Ultimate Beginner’s Guide to Backpacking with Babies: The Basics

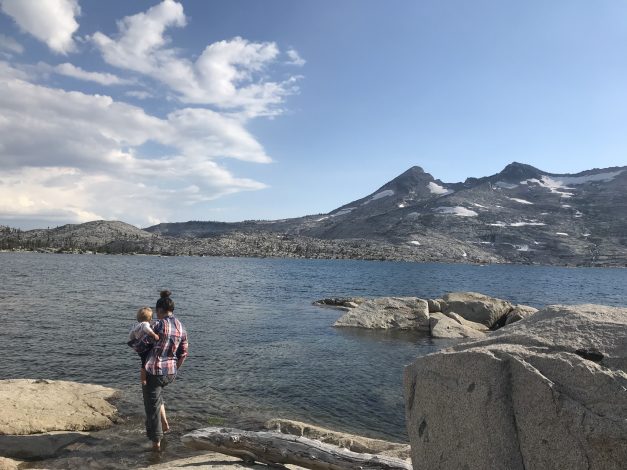 Walking deep into the mountains, along rivers to their origins in high alpine meadows where the land meets the sky, I look back and think about how backpacking has made a lasting impression on my life. Since the first time I stepped into the granite playgrounds of Yosemite 15 years ago, I promised my future self that I would share these “yahoo” moments with my kids from the moment they were ready. Well, it turns out that moment for my son came the first time we lowered him into a pack at 7 months old.
He looked up at me and grinned with his two teeth, and I knew that excited look on his face. It was the same face my wife tells me I get when I’m lacing up the morning of a trip. It was clear then and there that Squeaks, now 18 months, was a “ramblin' man” just like his dad. After several months of strategic planning sessions, gear adjustments and countless “shakedown” hikes (a practice hike to check gear and routine), my wife and I felt we were ready. We ventured out on our first of several overnight trips into the High Sierras that summer, but this time, there was a baby on our back.
Backpacking with babies: a 3-part series
This is the first of a three-part series on information you may find helpful when backpacking with babies. In this first installment, we will be going over all the basics you need to know. In our second piece, we will go over a comprehensive gear list for an overnight trip with your baby, including 5 game-changing items you shouldn’t leave home without. Finally, we'll wrap up our series with a list of "5 Things We Wish We Had Knew Before Our First Trip."
Determining the appropriate age
I'm often asked, “At what age is my baby ready for backpacking?” The answer is really family-specific. These were our family's contributing factors:
- We felt uncomfortable backpacking with Squeaks as a newborn. He still seemed too fragile and we were new parents trying to figure it all out.
- My wife had a very long labor and did not feel ready to haul large loads in the pack until our son was 6 months old.
- There is a weather window in the Sierras where we do the majority of our backpacking. We wanted to wait for the “thaw” to end. This is when the snow melts and rivers swell, making water crossings dangerous.
Considering these factors together, we decided to go on our first shakedown hike in the early summer when he was 9 months old. 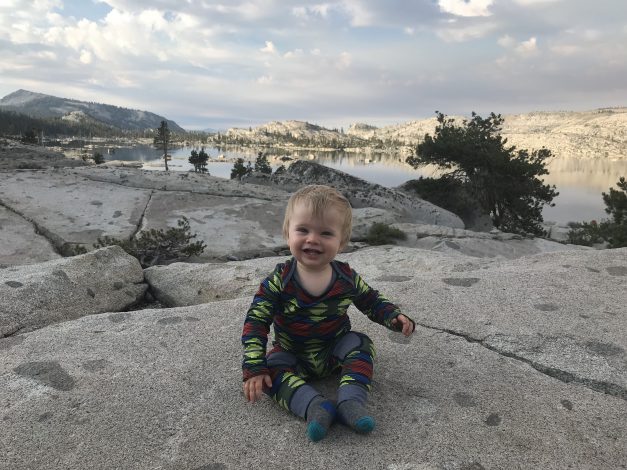
Going the distance
If you're just getting started, I recommend going out for a single night as a trial. Here are some questions you can ask yourself when deciding on the distance of a hike, both miles in a day and overall:
- How would I rate my hiking fitness level?
- Is the hike strenuous with lots of elevation change?
- How well does my baby sleep when carried
- What’s my baby’s awake time threshold?
Most of these questions can be answered in a few shakedown hikes. We ended up hiking around 8 miles per day with a 10-month-old at 8,000 feet.
Choosing a carrier
Most backpacking families will choose either a hard-frame carrier and have a partner carry most of the gear or a combination of a soft-structured carrier and backpack with one on the front and the other on the back. Hard-frame carriers are generally sturdy and supportive, breathable for both child/adult, adjustable in height, chock-full of extra features and incorporate a wide base which makes loading/unloading to and from the ground a breeze.
The downsides of a hard-frame carrier are that they are heavy, require full neck/head control for use, typically take some getting used when it comes to napping on trail, and can be difficult to load children in when wearing bulky layers, especially in winter months. The advantages of a soft-structured carrier are that they can be used prior to baby gaining head and neck control, but make sure you use the proper gear to help prop baby's head per the manufacturer's requirements. They promote more natural sleeping positions, provide warmth for babies on cold days and allow you to monitor your baby easily.
However, they may increase strain on your shoulders and back and lead to chafing from the carrier straps rubbing against the straps of your backpack. In general, they allow less room for airflow and obstruct your view of your feet when walking, which can be crucial on more technical terrain.
Partnering Up
Generally we recommend adventuring with a partner so you can share the load. Divvying up gear allows for weight distribution to help with trail endurance and increases flexibility as it relates to days on trail (more carrying capacity → more food → more days). For our family, using a hard-frame carrier was the best option. Mama carried Squeaks in the carrier, his clothes, that day’s food and a few other bits and bobs. I carried everything else but the kitchen sink in big 70L pack, including food packed in a bear canister (we are often in black bear country), water, tent, sleeping bags and pads, cooking kit, clothes, emergency kit, a first aid kit, electronics and a few other loose items. The pack weights came in around 30/45 lbs respectively for a 3-day trip. If sharing the load is not an option for you, have no fear! Carrying both baby and gear on your own can and has been done, just ask this awesome HiB mom! 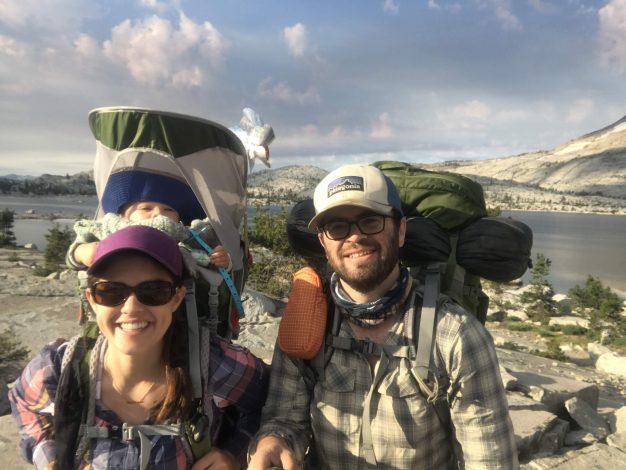
Preparing for naps and a good night's sleep
Our son only sleeps when he is moving. This is still true today! Both in the car and while carried, Squeaks wakes up when the motion stops. Every time. On the trail, it meant that once he fell asleep, we couldn't stop moving, no matter the number of uphill switchbacks we were facing or stopping to answer questions from other hikers. When we first starting hiking with the hard-frame carrier, our son’s naps seemed short. He would take 30-minute cat naps and wake up with an unusually short fuse.
After some tinkering and help from fellow backpackers and his loving G-Ma, we were able to make Squeaks a lightweight, waterproof pillow and a sun shade for the front of the pack to block out the visual stimuli (and get the sun out of his face!). We think these two modifications helped improve his trail sleep. When it came to sleeping at night in the tent, we did whatever it took to keep him quiet. I’d like to tell you that our nights went off without a hitch, but that would be far from the truth.
Mama and Squeaks slept on a double pad and I slept on a single. We found it useful for my son and wife to sleep level with each other so it was easy to nurse if needed during the night. For sleeping bags, we used two wide down quilts with my wife and son sharing one. He slept in between us and toward the top of the pad, so the quilt only laid across his legs.
Choosing the right clothing
When it came to dress our little man, we focused on layering, sun protection and clothing that is quick-drying and durable.
1. Layering - Especially when it's cold out, layering is key. If your baby is in a hard-frame carrier, remember they are not warming up through exercise like you. Here's an article on layering in the cold weather to help you decide what and how much to pack.
2. Sun protection - Despite how counter-intuitive it feels, we recommend covering up with UV protective clothing as the primary defense against the sun. This becomes even more important when you are hiking in exposed, treeless areas or at higher altitudes where there is less atmosphere to block the sun’s light. In addition to UV-protective clothing, there are other ways to help you block the sun's harmful rays, such as applying sunblock and wearing hats.
3. Quick-drying and durable- At 10 months, our son was a crawling tumbleweed of death, collecting everything in his path. We needed pants that were quick-drying and durable, so we bought pants that had some synthetic material with interwoven nylon.
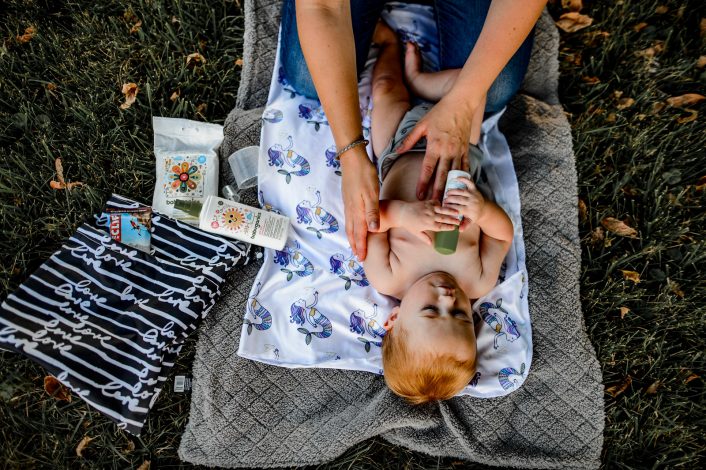
Using diapers on the trail
Disposables or cloth? It’s the age-long debate that all backpacking families encounter. While both options have their arguments for and against, our family decided on using disposables and here’s why: We didn’t want to do more than we had to. Once we unleashed the beast from his pack, Squeaks at this age was a full-time job. After hiking 8-10 miles a day, watching him was exhausting! There were also 142 other chores to complete once we stopped to break camp, and we simply didn’t want to add washing poopy diapers to the list. Whichever you decide to use, remember that what you pack in you must pack out. These Leave No Trace rules also apply to diapers, too! Here are a few additional details when it came to diaper duty on the trail in our experience:
- We wrote down the number of diapers we used at home over three days and took the average as a gauge of how many diapers to bring. We ended up packing out four daytime and 1 nighttime diaper per day.
- When it came time for a change, we used a small, water-resistant pad to set Squeaks down on.
- When we were done changing him, we scooped out the dirties from a soiled diaper and buried them in a 6"-8” cathole, 200’ away from a water source, then placed the used diaper in a large odor-free bag.
- If we were in camp or on a break, we laid out wet diapers so the sun would dry them out a bit before we put it into the odor-free bag..
- We dehydrated wipes before our trip and reconstituted them when needed with filtered water.
- We had a small travel size tube of diaper cream and hand sanitizer in the same bag as the dehydrated wipes.
Planning for food
Our family practices a Paleo diet which makes things a little harder when it comes to food. Aside from breast milk on trail, at 10 months, pouches were our best friend. They are not necessarily the lightest option but they are shelf-stable, quick and easy. Our son also enjoyed snacking on dissolvable finger foods and baby puffs when sitting on a break or at camp. Only when he was older did we give these foods in the pack when we felt like he could eat safely and the terrain didn’t jostle him around.
If your baby is not nursing, powdered formula is always an option for backpacking. We packed out something extra tasty for the first day since we didn’t have to worry about it spoiling or fitting into our bear canister. And we always try to incorporate fresh fruit and vegetables. Other options for babies are baby oatmeal, rice cereal, dehydrated baby food and other dissolvable snacks. If you practice baby-led weaning at home, consider early food options when planning your own meals so your baby can eat them too. Just remember, eat before changing your baby into their sleep clothes.
Leaving food scents on clothes may lead to night-time visitors! Stow any food, food-stained clothing or hygiene products with scents safely in a provided food locker, hung off a tree/pole or placed in a bear canister. Do not leave food or trash in your tent or unattended in your camp.
Considering options for drinking water
Treating water while backpacking is a necessary precaution before taking that tempting sip in an ice cold stream, even if you are above the treeline. After all, even marmots poop! There are generally two types of treatments: purification and filtration. If you are curious about the different types of water treatment, this HiB article dives deeper into the subject.
For our family, we devised a gravity system using a filtration device to treat water which served us well both in camp and on trail. A gravity system is where you hang a “dirty bag” with unfiltered water above a “clean bag” and connect the two with a filter. This system allowed us to “set it and forget it.” To balance weight, I carried all of the water on our trips in 1L Smart Water bottles with sport tops that both my wife and I could access anytime. Our son also drank from the sport top water bottles with some practice.
However, we will probably change our filter setup and use a bladder with drinking hose for the parent carrying Squeaks next go-around simply because it was hard to drink while walking. Now that you know some of the basics of backpacking with a baby, check back for our next installment which will focus specifically on the gear we used. Do you have more questions about the basics of backpacking with babies? Please let us know in the comments below.
Read more:
- Hard-framed carrier: how to improve the quality of your hike
- How to carry supplies when hiking with a soft-structured carrier
- How to layer when babywearing in the cold
Photos by Joe Linehan and Laura Castro.
ABOUT OUTGROWN
OutGrown is a 501(c)(3) nonprofit that works to create a world where everyone can enjoy the physical and mental benefits of spending time outside. We are focused on creating opportunities and removing barriers to access so families with babies and young children can take their first steps outside. We believe all families have the right to connect with nature, benefit from spending time outdoors and be inspired to a lifelong love of nature. Since its grassroots inception in 2013, OutGrown is a growing community of 280,000 families and over 300 volunteer Branch Ambassadors. More information on all of our programs can be found at WeAreOutGrown.org
EDITORS NOTE:
We hope you enjoyed reading this article from OutGrown. We’re working hard to provide our community with content and resources that inform, inspire, and entertain you.
But content is not free. It’s built on the hard work and dedication of writers, editors, and volunteers. We make an investment in developing premium content to make it easier for families with young children to connect with nature and each other. We do not ask this lightly, but if you can, please make a contribution and help us extend our reach.
Related Content


Comments