
How to thru-hike on the Appalachian Trail with a baby
- Blog How to thru-hike on the Appalachian Trail with a baby

Deciding to thru-hike the Appalachian Trail (AT) didn't happen overnight for us. We had been dreaming of thru-hiking for almost 10 years; we just never imagined that the best time in life to do so would be after we had our first baby, Ellie.
From the time our daughter was two months old, we started hiking regularly as a family. But hiking wasn't anything new for me and Derrick. In fact, the outdoors had been the center of our entire adult education and career. This meant it probably didn’t come as a surprise to those around us when we announced that we had decided to thru-hike the Appalachian Trail with Ellie on a six-month backpacking trip.
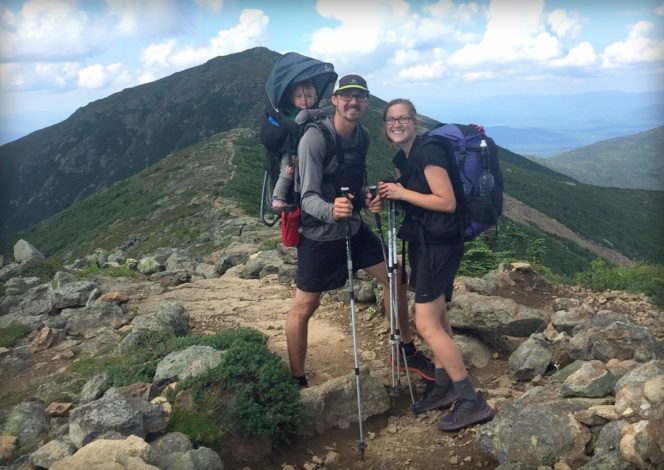
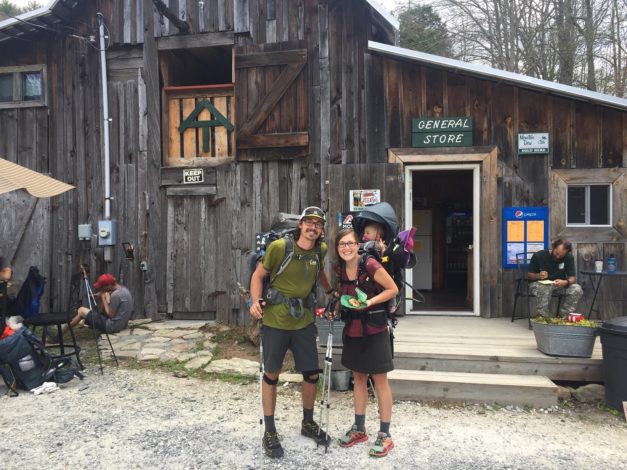
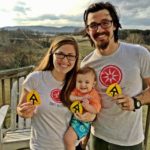 Bekah, Derrick and Ellie live in Roanoke, VA, and are ambassadors for Hike it Baby. They hiked the entire Appalachian Trail in 2017 over a six-month period, doing what’s called a “flip hike.” They started at a midpoint on the trail, hiked the southern portion and came back to that same point to hike the northern portion. Two sections put together to make the full 2,190 miles.
Preparing to thru-hike with a baby
Derrick and I both graduated college with a degree in Outdoor Leadership, then took the same career path guiding hiking trips for families in the southeast and backpacking trips for inner-city youth. Not only did we have prior backpacking experience, but a large amount of that experience involved taking care of others while out on the trail. This was definitely a key component for us to thru-hike with a one-year-old. Backpacking skills were second nature to us. Other than walking, we were able to focus on Ellie and her needs rather than on how to backpack. We were also medically trained for wilderness emergencies as Wilderness First Responders. When we decided we were going to thru-hike with Ellie, the first thing we did was scour the internet for resources on how to distance hike with a baby. To our surprise, there was very little information. We pieced together what we could and made up the rest as best as possible. We knew we had a pretty tight time frame in which this would be possible.
Packing baby supplies for the trail
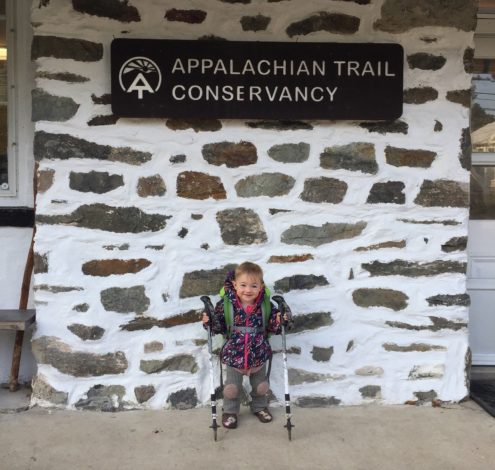
We wanted to wait until Ellie could sit up so she could sit in the Deuter Kid Comfort 3 backpack. And we wanted to complete the trail by the time she gained too much independence to be carried in a pack for multiple hours every day. Not to mention before she gained too much physical weight, too. We left when Ellie was 12 months and finished when she was 18 months, which was a perfect window of time. After deciding on a time frame, we honed in on her nutrition, diaper and clothing needs. Ellie was breastfed the entire thru-hike, which helped meet her nutritional needs perfectly. In addition, she would eat little bites of our food, which were freeze-dried and pre-packed in advance. A few things to note when journeying so far with a baby: We didn't pack any separate food for her. Diapers were a constant battle, and we still don't have a great solution! The wet and humid Appalachian Trail climate meant cloth diapers were nixed immediately, but we also aren't a fan of disposable diapers. We mostly used Diapers, which have a composting insert in a cloth cover. We had the option of burying the inserts, but preferred to pack them out instead. Ellie's clothes were minimal, but we made sure she had enough to stay warm at any point during the seasons. Then other than a toddler toothbrush, that's all we had for Ellie. Her toys were sticks and rocks, and some of her first words were "backpack" and "blaze."
Tips for thru-hiking with a baby
Now that we’re back home, we’re so thankful we got to take Ellie with us on our AT thru-hike and wouldn't have it any other way. The reward of spending that quality time with her on the trail was undeniably one of the most remarkable experiences of our lifetime. But I’m not going to lie, it was hard! Long-distance hiking with your baby is possible—and even enjoyable—but it's not necessary to do a thru-hike in order to have an adventure with your baby. While it certainly isn't necessary to have the same resume as we did to long-distance hike with a baby, there are some key components that are important. Here are our top five tips to successfully distance hike with a baby:- Become a pro in the skill prior to adding a baby in the mix. If you already have kids, this will be a little more challenging, but not impossible! Many backcountry skills, such as cooking, filtering water and pitching a tent, can all be practiced at home. However, we definitely recommend practicing those skills in the backcountry until you're comfortable with them before bringing baby.
- Be flexible. Ellie's needs were more important than the trip's agenda. This was especially true when it came to inclement weather. While Derrick and I probably would keep hiking through rain and snow on our own, we waited out the bad weather in town with Ellie.
- Invest in ultralight equipment. A baby is a pretty lofty luxury item! It was important to us to efficiently walk quickly while Ellie napped in the pack, and efficiency is definitely impacted by pack weight. While Ellie may have been an average 20 lbs on the trail, we cut down in every other way possible. From our sleeping bag to our tent, we made sure we had the lightest gear for our needs. We were thankful for every ounce we got to drop!
- Acquire Wilderness medicine experience. We highly recommend a Wilderness First Responder course. While it is lengthy and costly, the skills you learn will give you a priceless peace of mind to be able to respond to a medical emergency in the backcountry if needed.
- Make the transition from home to tent as seamless as possible. Ellie slept in our bed longer than anticipated because she'd be sleeping between us in the tent. We knew we would be tenting near other hikers, so we made sure we had a way to soothe Ellie should she get upset. For Ellie, this was nursing her. If she awoke upset in the middle of the night, I could calm her by nursing her immediately. Also, we constantly were wearing her around the house, out to errands, and, of course, hiking on the trail. She got accustomed to being worn all the time everywhere. These three things made our transition to the tent seamless.
Read More:
- Thru-hiking the Appalachian Trail with a Baby
- How one mom turned trail time into nap time
- Nature babies: Why having young kids in nature is so important for their health
Bekah, Derrick and Ellie live in Roanoke, VA, and are ambassadors for Hike it Baby. They hiked the entire Appalachian Trail in 2017 over a six-month period, doing what’s called a “flip hike.” They started at a midpoint on the trail, hiked the southern portion and came back to that same point to hike the northern portion. Two sections put together to make the full 2,190 miles.
Related Content


Comments